View/edit a file from the command line using vi
vi is a text editor which can be used directly in the terminal window using the command-line. This tutorial will cover the basics of the program, including how to create, open, edit and save documents.
Step 0:
vi comes pre-installed on most Mac computers and Linux systems. If you plan to use it on a Windows system, you may need to download it and more information can be found here: Download vim
Since vi is already installed on the storm server, for this example tutorial we have remained logged on as described in the previous tutorials How to: remote login from MAC or How To: remote login using MobaXterm (Windows) with the username “cking74”.
It may also be helpful to know the cd (change directory), pwd (print working directory) and ls (list contents) commands for this tutorial or to be familiar with the concept of absolute and relative paths. They are covered in the tutorial Introduction to Linux.
Step 1:
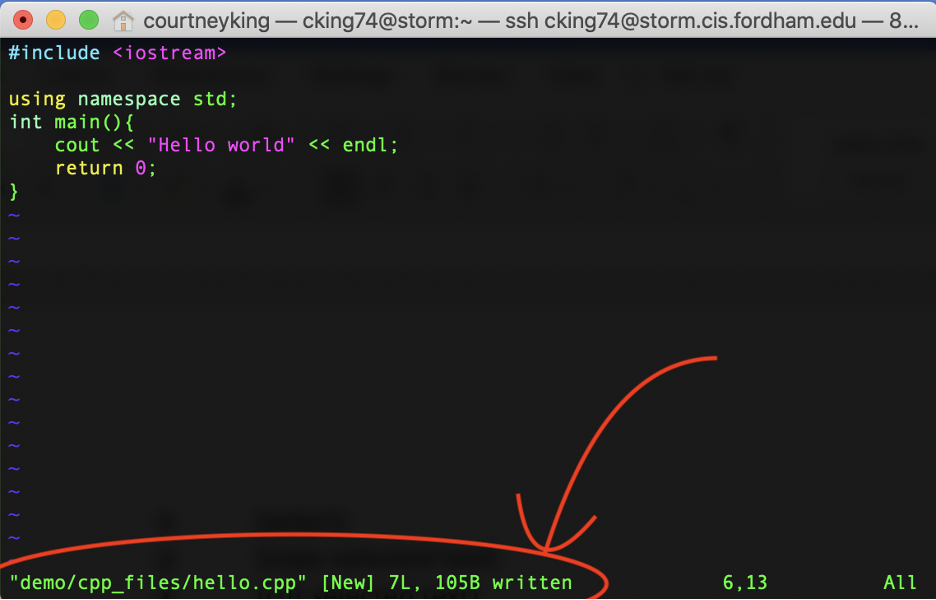
To create a file using vi, you can simply type ”vi” followed by the location and name of the file that you wish to create into the terminal window and press enter. Here is the command we use to create a file named “hello.cpp” at the location “/home/students/cking74/demo/cpp_files” of the remote machine:
vi /home/students/cking74/demo/cpp_files/hello.cpp
After executing the command, a blank file will appear on the screen, and you can see the location/file name and “[New]” in the bottom left corner of it as shown below. This file can be written to, saved or discarded as will be discussed in the following steps.

It is also worth noting that if any of the directories mentioned in the location used with the command do not exist, they will additionally be created in the process.
Step 2:
Files can be edited using the insert and visual modes. (vi automatically opens in the command mode which is discussed further in step 6.)
The insert mode temporarily disables the command mode and allows you to type your changes into the document using the full keyboard. To enable, press i. Note that pressing enter is not required to enable the mode and will result in a blank line being added to the document. While the insert mode is active –INSERT– will be displayed at the bottom of the terminal.
The example below shows some text being added to the file created in the previous step using the insert mode.

The visual mode allows you to select, cut, copy and paste. It is enabled by pressing v. While active, –VISUAL– will be displayed at the bottom of the terminal and the following commands can be typed directly into the terminal:
- v : (enable/select)
- y : (copy selected text)
- x : (cut selected text)
- p : (paste cut/copied text)
The example below shows text being highlighted in the visual mode.

To exit either of these modes and return to command mode, press esc. We’ll proceed to saving or discarding the changes in the following steps.
Step 3:
To save a file, press esc, type the following command, then press enter:
:w
In the example shown below, we save the text inserted into “hello.cpp” in the previous step. You can see the word “written” in the bottom left corner, indicating that it has been saved at the location shown.
With a quick check, we can confirm that the file now exists in the location specified.

Step 4:
To close a file, press esc, type the following command, then press enter:
:q
Note that if you edited the file and have unsaved changes on it that you wish to discard, you will likely get an error if you try to run the above, and need to use the following instead:
:q!

You can also combine the save and close commands into a single step with:
:wq
Step 5:
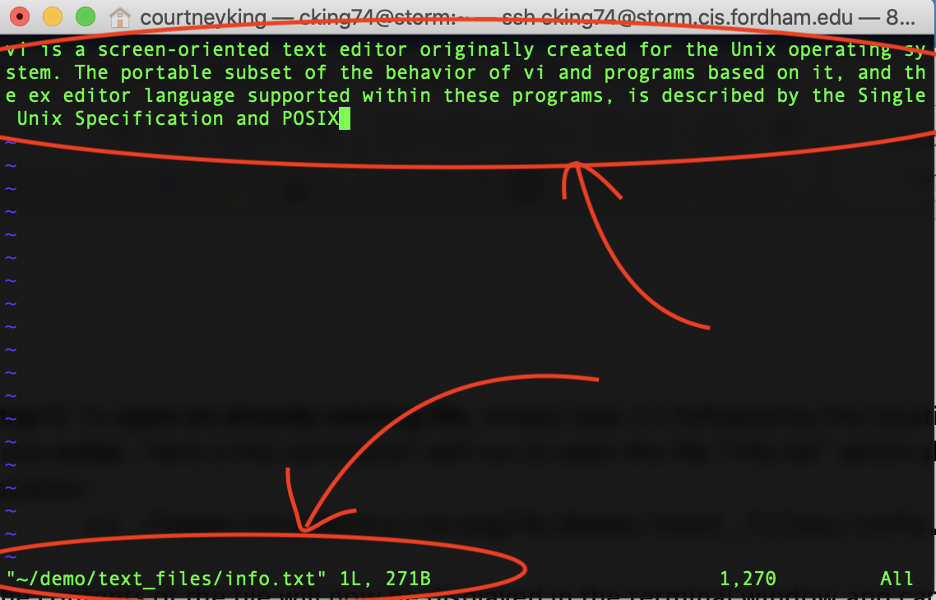
To open an already existing file, simply type “vi” followed by the location and name of the file and press enter. Here is the command we will run to open the file “info.txt” which already exists at the specified location:
vi /home/students/cking74/demo/text_files/info.txt
The contents of the file will now be displayed in the terminal window and can be scrolled through with the arrow keys. In this example, we can see that “info.txt” contains a paragraph about vi and its location in the bottom left corner. Notice that the word [New] is not present, as was when we created a file in Step 1.
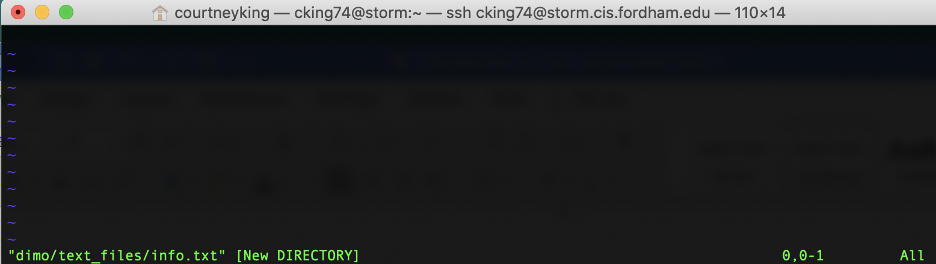
When attempting to open a file with vi, be sure to double check that the name of the file and path are correct. As shown in step 1, vi will attempt to create new files and directories for ones that don’t already exist if requested, which may be confusing at first.
In the example below, it was intended to open the same file “info.txt” with the following command:
vi /home/students/cking74/dimo/text_files/info.txt
but as you can see, “demo” was accidentally misspelled. vi attempted to create a new folder named ‘dimo’ when enter was hit (shown below). Since we realized the mistake, we can just closed the file without saving it (as discussed in step 4).
Step 6:
As aforementioned, vi automatically opens in command mode. While in this mode, you can speed up navigating through the document by using these commands rather than arrow keys. (Try them out!):
- j : (down one line)
- k : (up one line)
- 0 : (beginning of current line)
- $ : (end of current line)
- 1G : (first line of file)
- nG : (nth line of file)
- G : (last line of file)
Step 7:
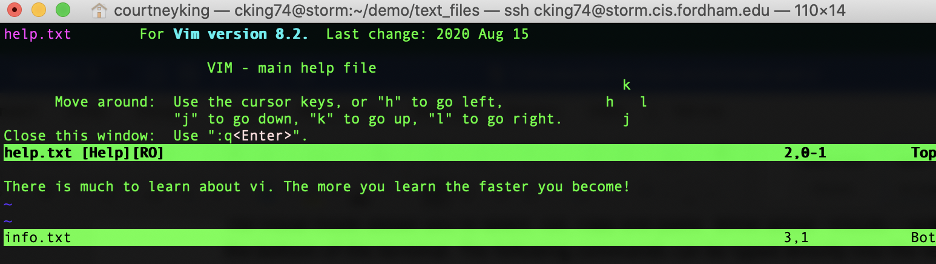
For more information and usage tips while using vi, you can type the following into terminal and press enter:
:help
This will display the following document, which can be read and closed by typing :q and pressing enter.
More information about vi can also be found here: vi Editor Tutorial
Congratulations! You now know the basics of vi and how to create, view and edit documents using it!