How to: transfer files to/from remote machine (MobaXterm)
Step 1:
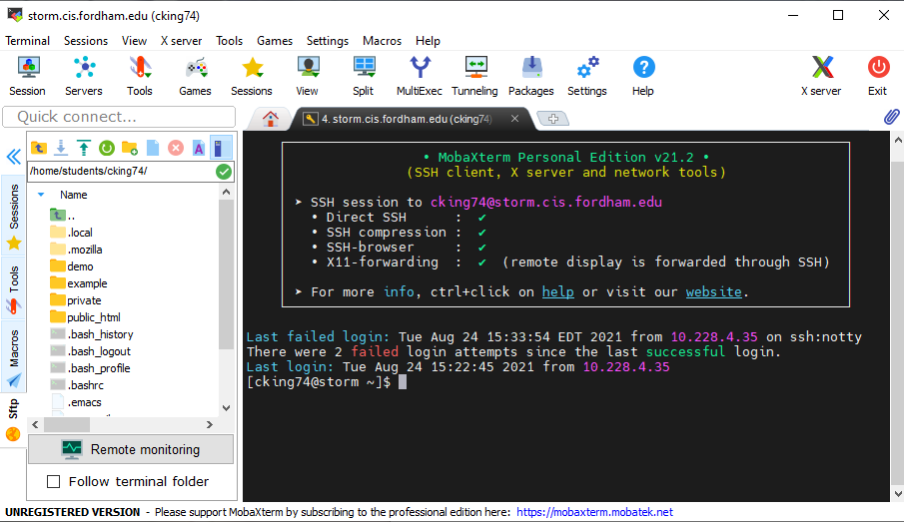
Make sure you are connected to the internet, then launch the MobaXterm application and log on to the remote machine. If you are unsure about anything mentioned in this step, please reference the previous tutorials, How to: Install MobaXterm and/or How to: Remote Login using MobaXterm
The following screenshot shows the username “cking74” currently logged on to the storm servers. You should see something similar before continuing on to the next step.
Step 2:
Using MobaXterm, you can easily view and access the remote machine using the window to the left of the terminal. You can see its current location displayed in the top bar and navigate through the machine by clicking on the folders as shown in the screenshot below.
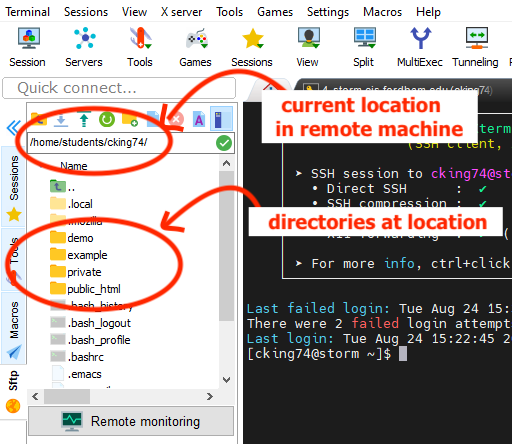
In the above example, we have just logged into the remote machine, so the folder we are currently accessing is /home/students/cking74 which contains the directories private, public_html, demo, example as circled, other files and a green arrow button which we can use to go back a directory.
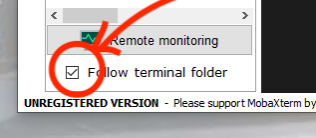
You can also navigate the machine via the command-line in the window to the right and see the changes reflected in the folder to the left if you check the Follow terminal folder box.
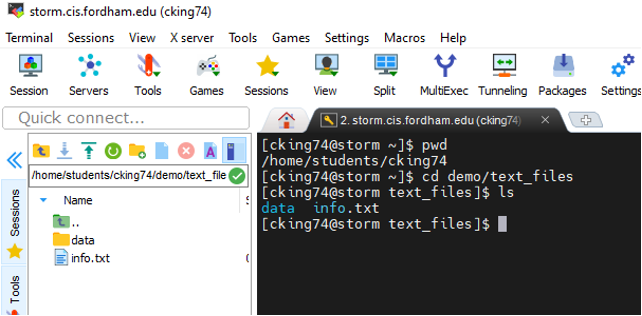
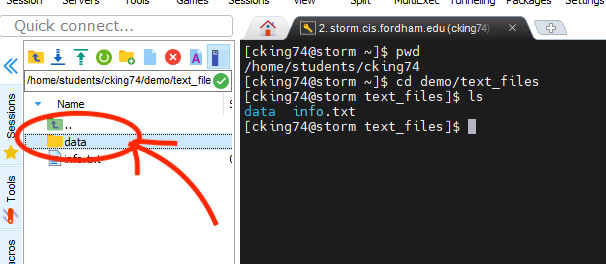
The following example shows how to navigate to /demo/text_files via the command-line using the pwd, cd and ls commands, with the window on the left adjusting itself accordingly. (Don’t worry if you are not yet familiar with these commands, they are covered further in the Introduction to Linux tutorial.)
Step 3:
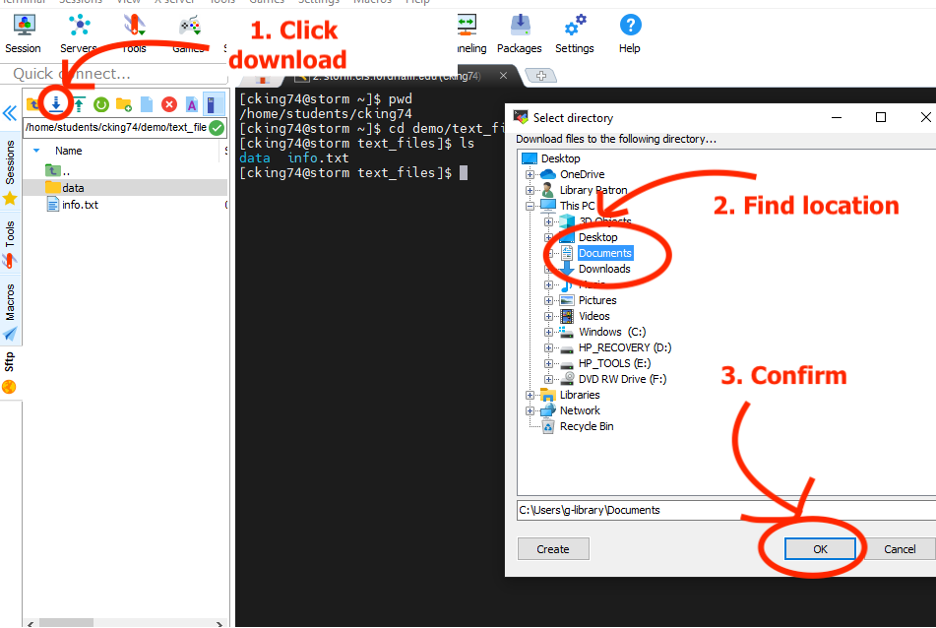
To download a file on to your local machine, first locate and select the file on the remote machine that you wish to download using one of the methods explained in the above step. In this example we will be downloading the folder “data” from the location in the remote machine which we navigated to in the previous step. (To download a file or folder is the same process.)
Next, click on the blue download arrow. A window displaying your local machine will pop up prompting you to select the location where you wish to download the files. After doing so, click the OK button to confirm the download.
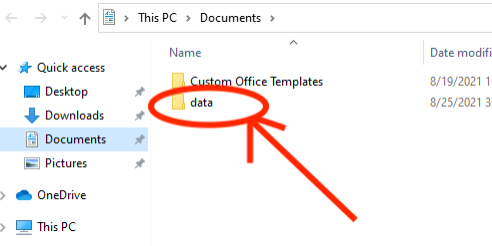
Then you should see the files appear on your local computer. We can now see the “data” folder exists in the “Documents” folder in the example below.
Step 4:
To upload a file to the remote machine from your local machine is a very similar process. In this example, we will be uploading an image from the folder “Screenshots” from a local computer to the remote machine.
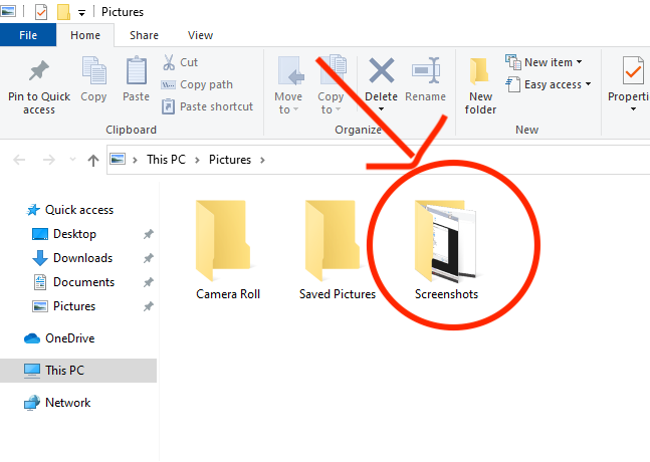
We will upload it to the folder where we are currently located on the remote machine named “text_files” First, we will click the green upload button which will bring up a window of the local computer. We will navigate to the “Screenshots” folder through this window, open it and select the screenshot to upload. Then we will click open.

After this, you can now see the image, “Screenshot (1) has been transferred to the remote machine as shown below.

Step 5:
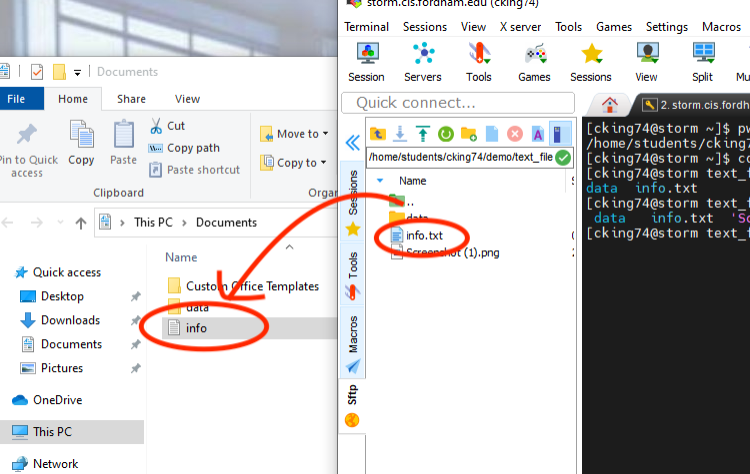
Documents can also be exchanged between the local and remote machines by simply clicking-and-dragging. In the following screenshot, you can see the results of clicking and dragging the file “info.txt” from the remote machine into the Documents folder of a local computer. Similarly, files can be dragged from the local machine into the remote machine.
Congratulations! You can now transfer files between a local and remote machine using MobaXterm!